Do these in order, parked, with time to fiddle. The whole setup takes about fifteen minutes the first time and seconds every time after.
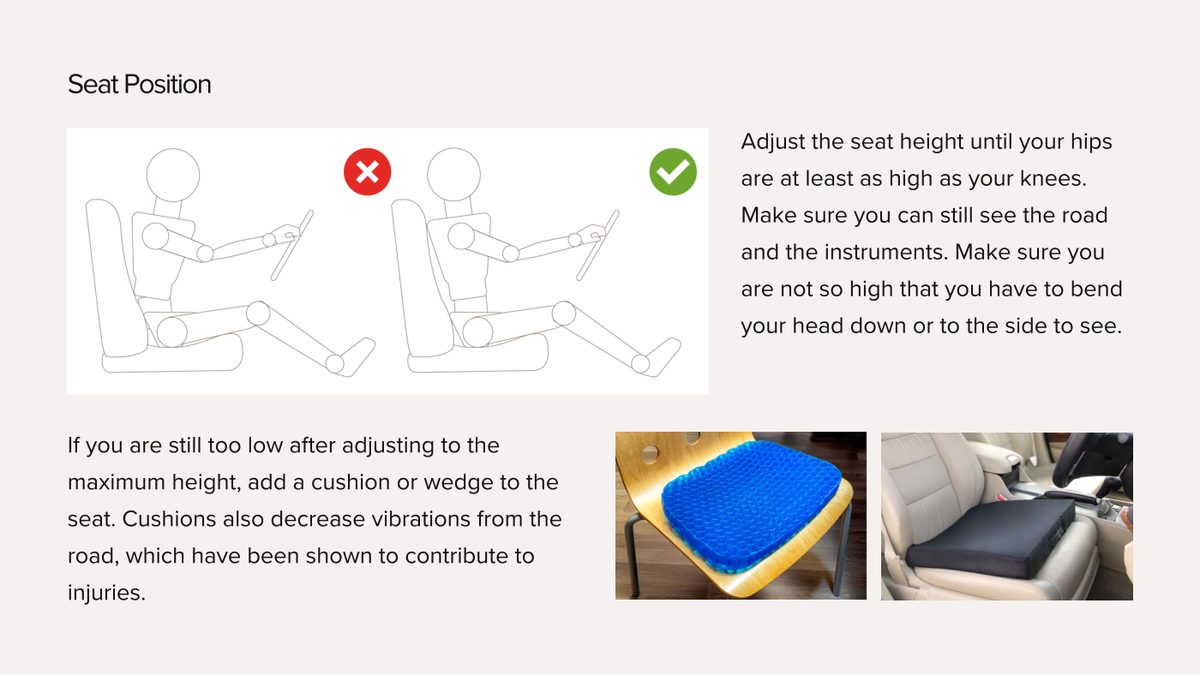
Seat heightAdjust the seat height until your hips are at least as high as your knees. Make sure you can still see the road and the instruments, and that you are not so high you have to bend your head down or sideways to see. If you are still too low at maximum height, add a cushion or wedge. Cushions also decrease road vibration, which has been shown to contribute to injury.
notice: can you see everything without your neck doing extra work?
Step 1: seat height, with cushion and vibration notes
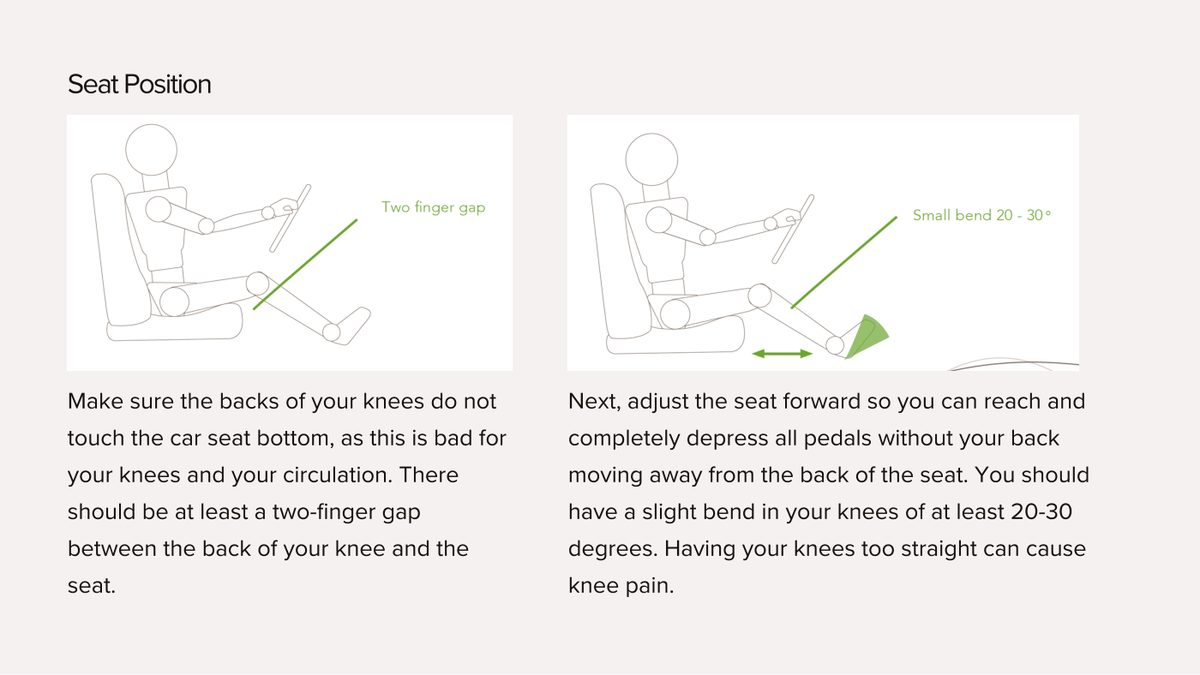
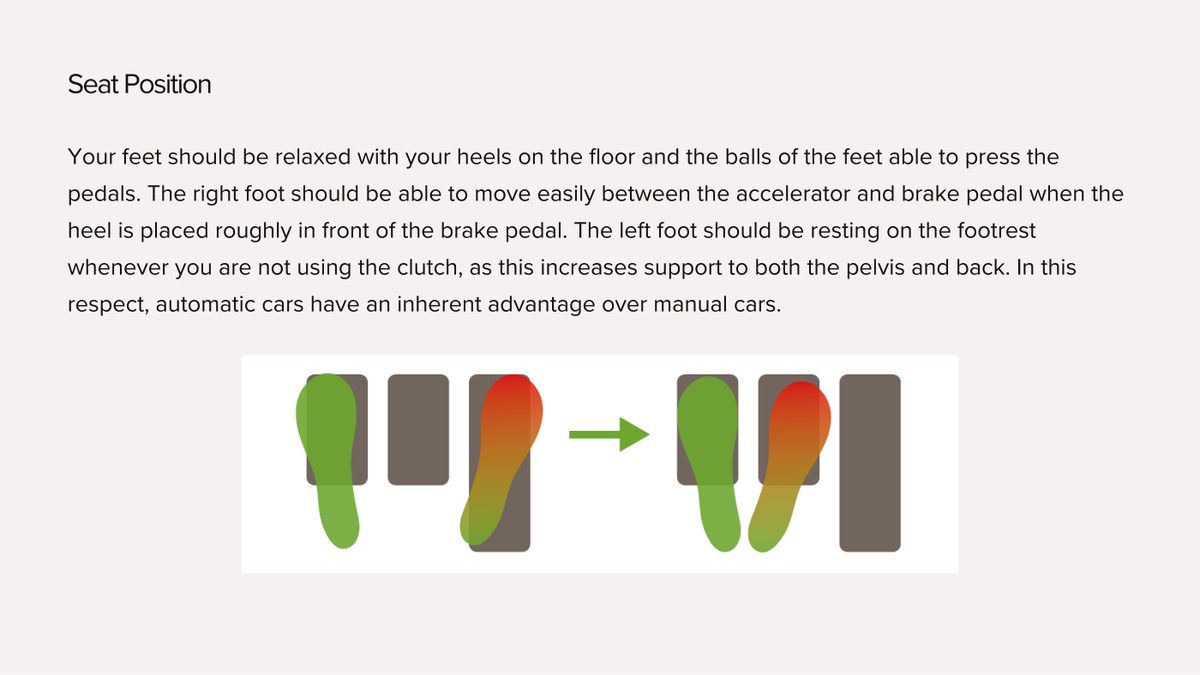
Seat depth and forward positionThe backs of your knees should not touch the seat bottom; keep at least a two-finger gap for your knees and your circulation. Slide the seat forward until you can fully depress every pedal without your back leaving the seat back, keeping a slight 20 to 30 degree bend in your knees. Knees too straight can cause knee pain. Heels rest on the floor, balls of the feet on the pedals; the left foot lives on the footrest when not in use, which supports the pelvis and back. In this respect, automatic cars have an inherent advantage over manual cars.
Step 2: the two-finger gap and pedal reachFeet relaxed, heels down, footrest in use
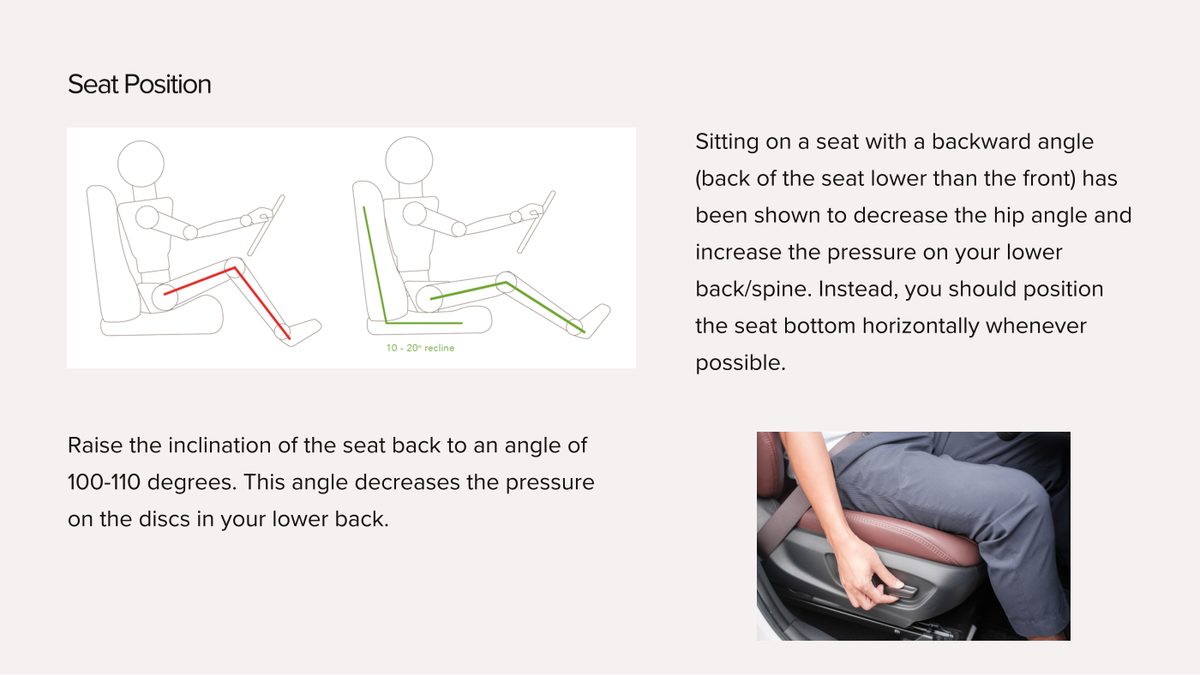
Seat pan and reclineA seat tilted backward (front higher than back) decreases the hip angle and increases pressure on the lower spine, so keep the seat bottom horizontal whenever possible. Recline the seat back to 100 to 110 degrees; that angle decreases pressure on the discs of the lower back.
Step 3: level seat pan, 100 to 110 degree recline
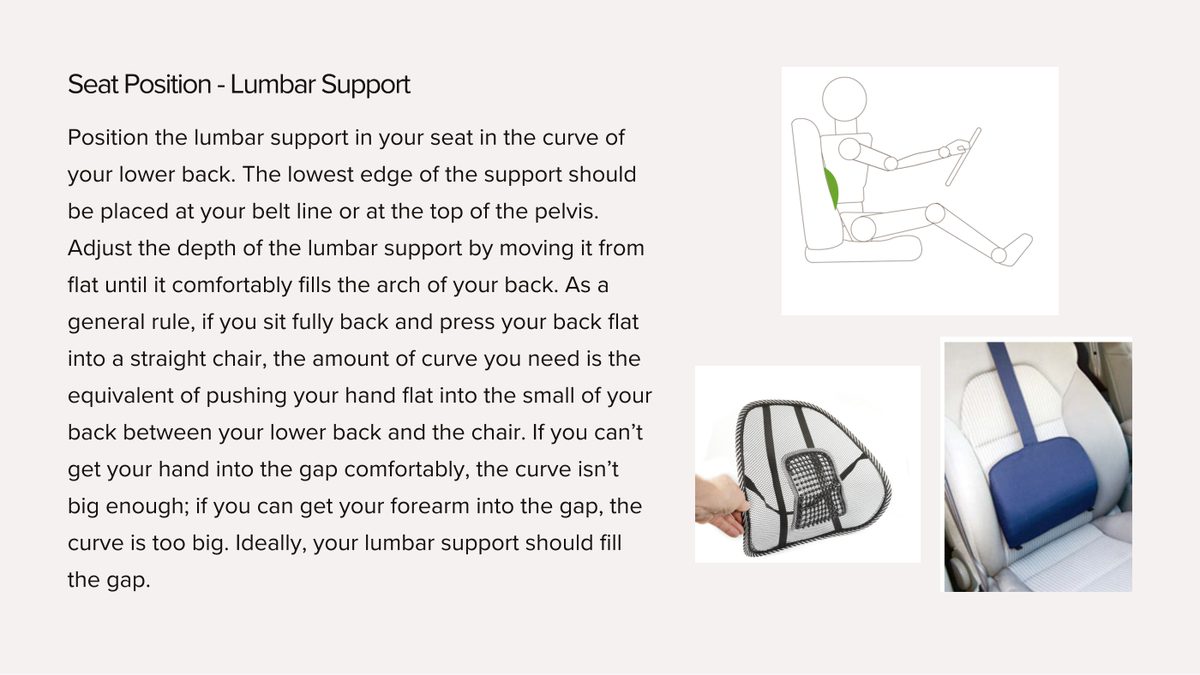
Lumbar support: the fill-the-gap testPlace the lumbar support in the curve of your lower back with its lowest edge at your belt line, the top of the pelvis. To size the curve: sit fully back and press your back flat; the curve you need equals a flat hand slid into the small of your back. If your hand does not fit comfortably, the curve is too small. If your forearm fits, it is too big. The support should exactly fill the gap.
Step 4: lumbar support and the fill-the-gap test
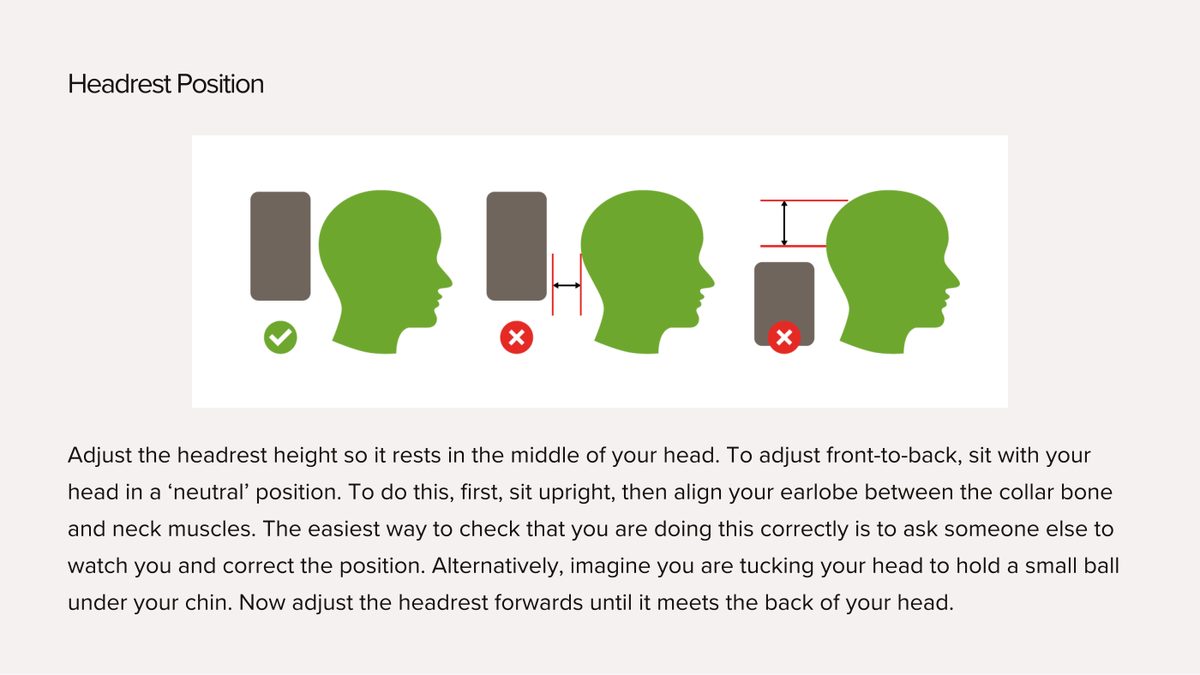
Headrest: find neutral firstSet the headrest height to the middle of your head. Then find neutral: sit upright and align your earlobe between the collarbone and neck muscles, or imagine tucking a small ball under your chin. Ask someone to check you the first time if you can. Now bring the headrest forward until it just meets the back of your head.
Step 5: headrest height and finding neutral
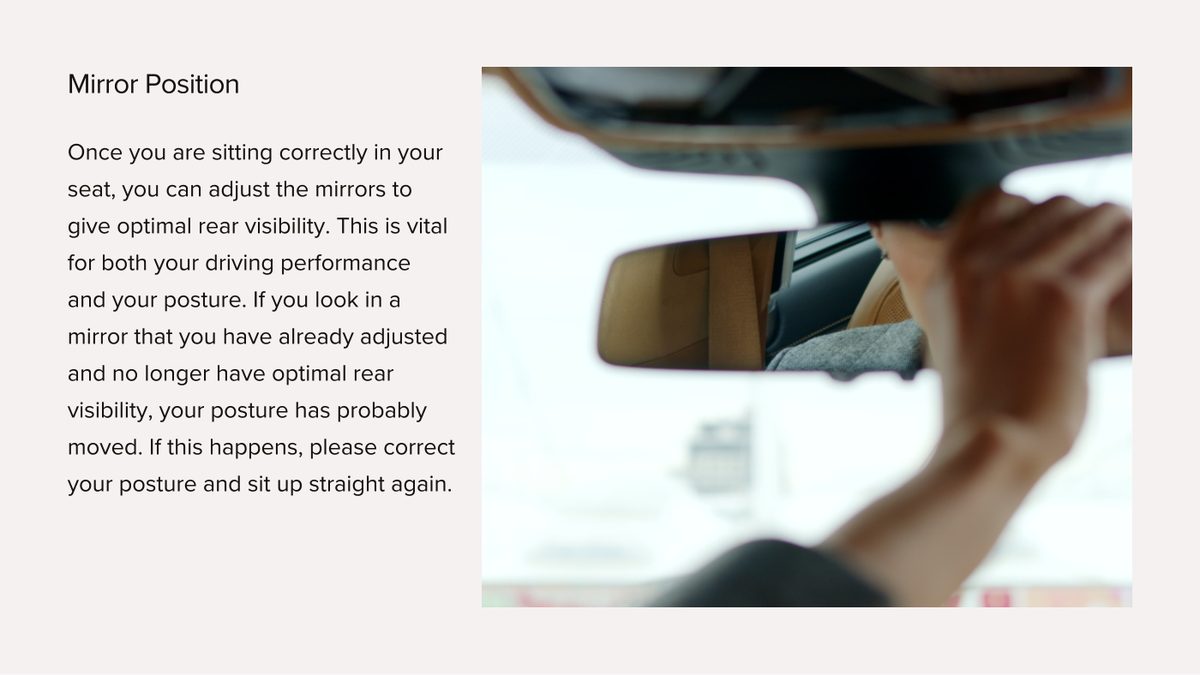
Mirrors and wheel: the posture alarmOnly after you are sitting correctly, set the mirrors for optimal rear visibility. From then on the mirror doubles as a posture alarm: if you lose the view, your posture has moved; sit tall again and the view returns.
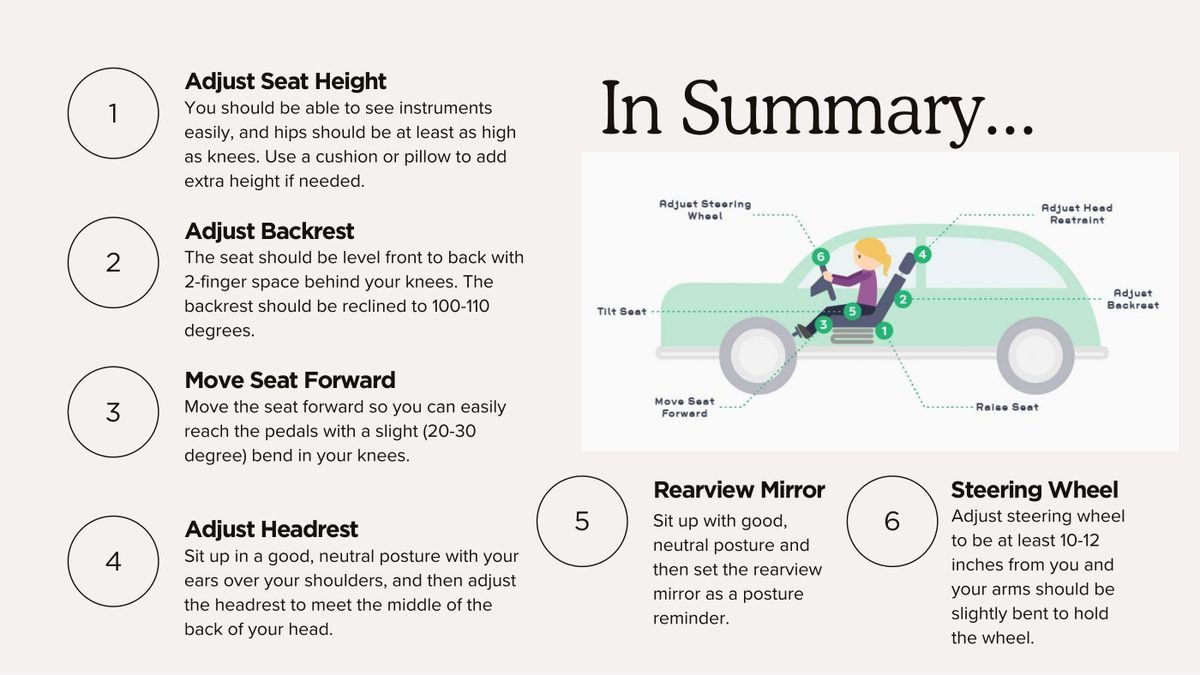
Step 6: mirrors as a posture alarmThe six-point setup, summarized
The quick re-check, every drive: hips at least as high as knees, two fingers behind the knees, backrest 100 to 110, slight knee bend at the pedals, neutral head at the headrest, mirrors true.